Lab. Header
Tabs: Page Setup - Lab. Header - Report Header - Method - Calibration - Chromatogram - Results - Sequence
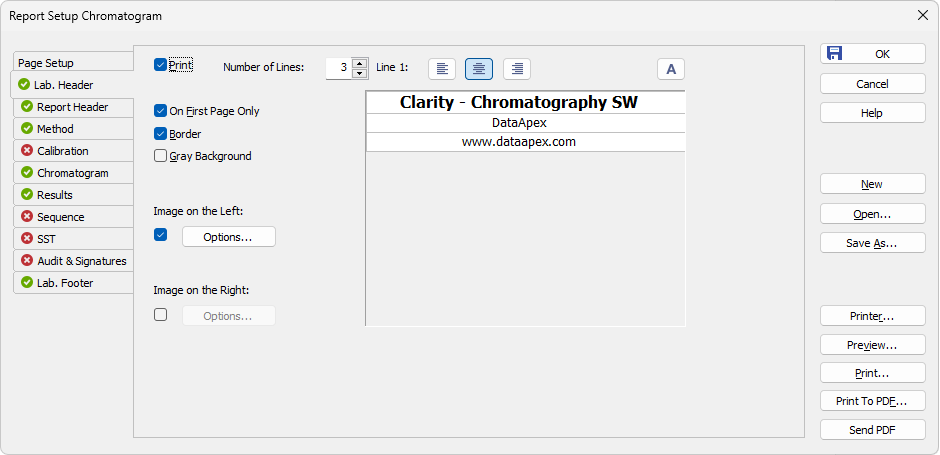
Report Setup - Lab. Header
Sets the print of the header on the first page only.
When checked, places the header in a frame made of thin lines.
When checked, prints the header with a gray background (blue when using a color printer).
Defines the number of lines in the header. New lines will be appended/removed to/from the end of the current list. Maximum number is 9. After clicking on any row, icon for selecting  appears in the right corner of the row. Upon clicking it, a list where you can pick available variables for additional details to be placed in the header is invoked. Variables that can be used:
Variables to display on the Report Setup - Lab. Header tab
| Name | Variable | Description |
|---|---|---|
| Analyst | %g | Inserts name of the Analyst who acquired the chromatogram. |
| Sample | %Q | Inserts name of the Sample. |
| SampleID | %q | Inserts value of the SampleID. |
| Method | %J | Inserts name of the method that was used to acquire the chromatogram. |
| Chromatogram | %C | Inserts name of the chromatogram and path to the chromatogram. |
| Current User | %k | Inserts the name of the currently logged user. |
| Print Date and Time in current Win format | %R | Insert the date and time of printing in currently used windows format. |
| Instrument Name | %e | Inserts value of the Instrument Name. |
| The percent sign % | %% | Inserts percent sign. |
Line 1(...9)
Indicates the current line for the purpose of formatting. Use arrows or click a line to make it current, then use one of the icons to change the alignment or format of the text:
Description of icons on the Report Setup - Lab. Header tab
| Icon | Description |
|---|---|

|
Left-aligns the text on the current line. |

|
Centers the text on the current line. |

|
Right-aligns the text on the current line. |

|
Selects the font for the current header line. Invoking the command will open the standard Font dialog. |
The changes in the header are then shown in the preview. Click the corresponding line and enter the required text, or click the existing text to edit it.
Mark the checkbox to print an image on the left (right) side of the page header. Use the Option… button to define the picture.
Invoking this button opens the Set Image Options dialog where the desired image and its dimensions can be set.
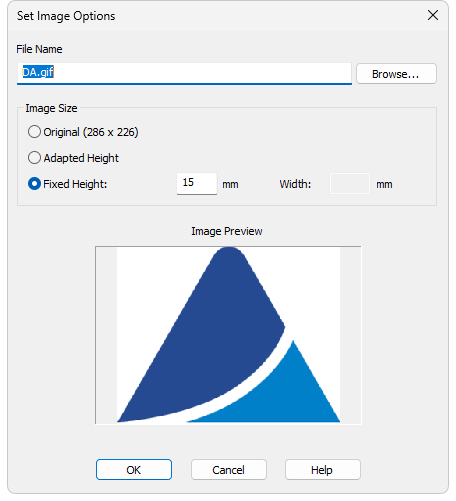
Set Image Options
Displays the filename of the image including its path (relative to the Clarity root directory). Clarity supports various image files formats. It is recommended to use preferably *.png, *.jpg or *.jpeg image files.
The image size can either correspond to the specifications in the file (Original) or can be resized to the height of the header (Adapted Height) or to explicitly specified dimensions (Fixed Height).
If the image and text do not fit to the page width, Clarity will provide a warning when opening the Print Preview dialog, divide the header in thirds (halves when only one image is selected) and print its contents without respect to the actual dimensions.
Caution:
Check the page header using the Preview button to see whether the image and text fits on the page.
Caution:
The size of the page depends on the selected printer. Re-check the page when you switch to another printer.