This is an example on how to setup a new report style to obtain the results shown in the picture
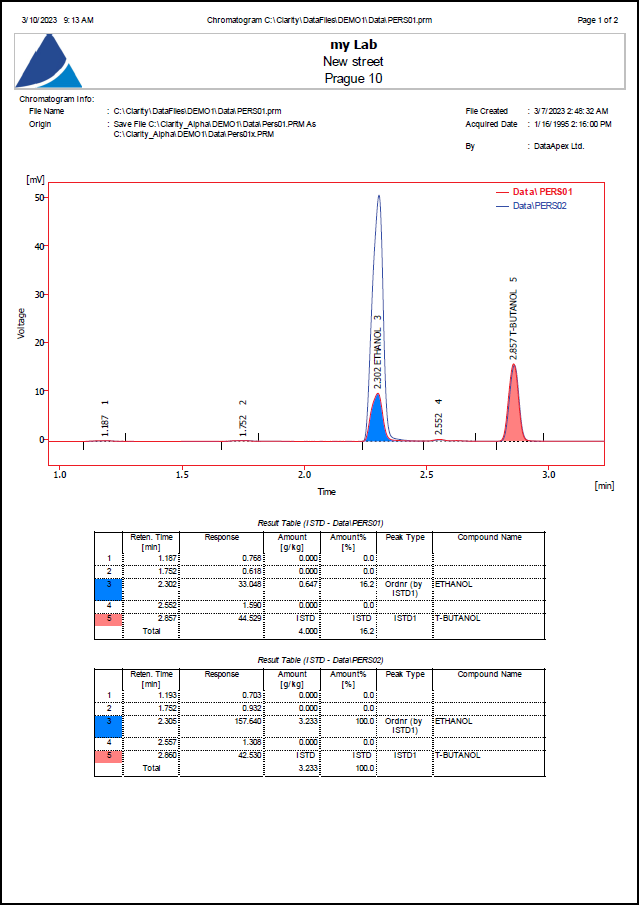
- Open the chromatograms PERS01 and PERS02 in overlay (located in C:\CLARITY\DataFiles\DEMO1\Data).
- Select the graph area you want to print by clicking and dragging the cursor in the chromatogram graph.
- Create a new report style.
- Select the File - Report Setup.
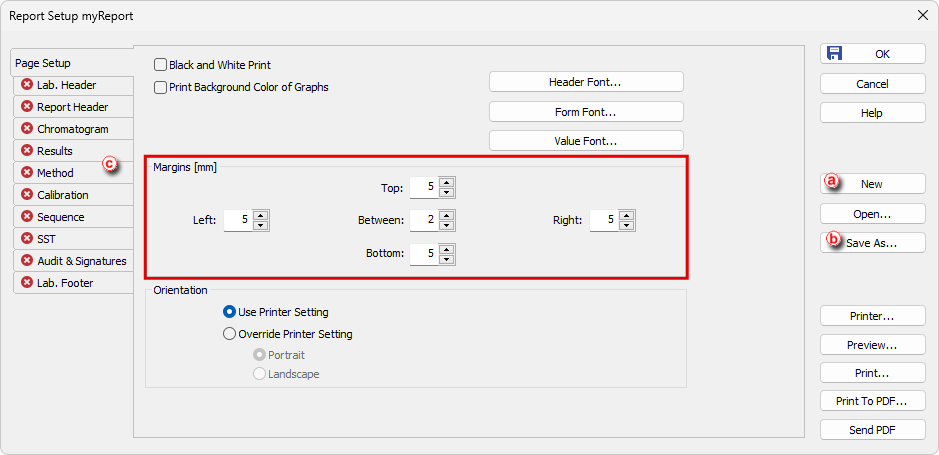
- Click on the New button ⓐ to create a new report style.
- Click on the Save As... button ⓑ and save the style under the name (myReport in this example).
- Click and drag the tabs ⓒ to set them in desired order. This will be the order the sections will have in the report.
- Set the Margins as needed.
- Set the Lab Header.
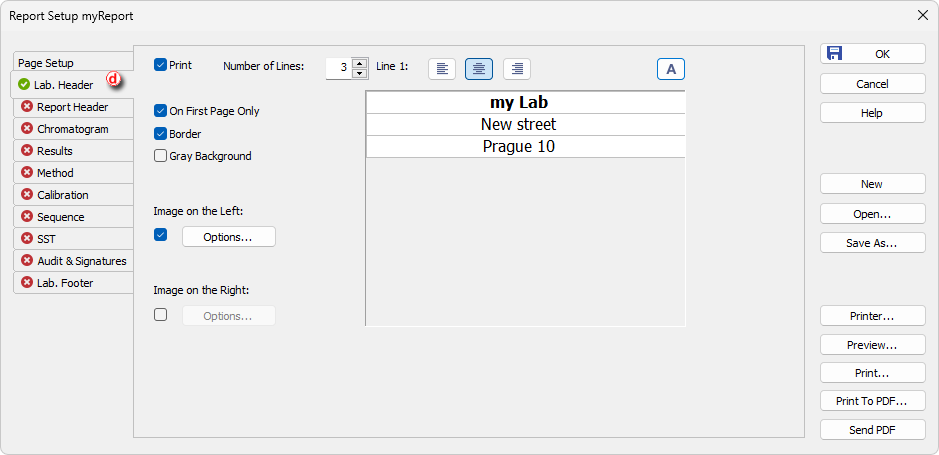
- Click the Lab Header tab ⓓ.
- Check the checkboxes Print, On First Page Only and Border.
- Check the Image on the Left checkbox and click on the Options... button to select the logo.
- Click in each line in the text box and write the you want to have in the header.
- Click in the first line of text and then on the Font icon (icon with "A") and select Bold as a Font Style.
- Set the Report Header.
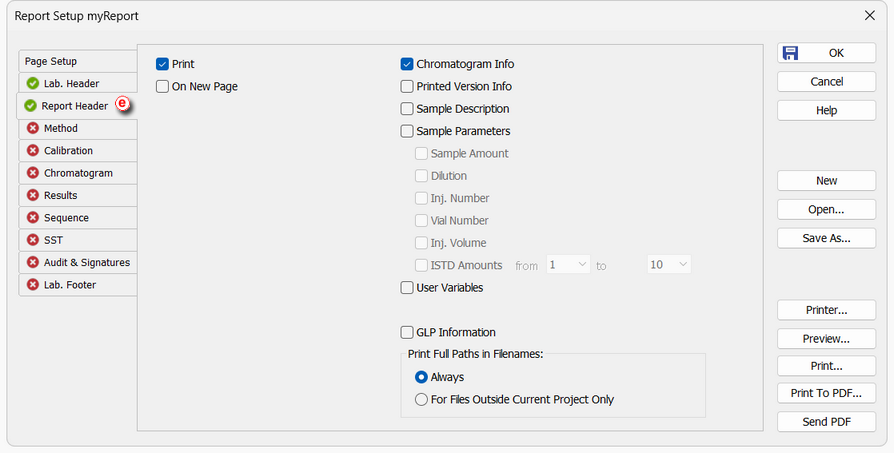
- Click the Report Header tab ⓔ.
- Check the options Print and Chromatogram Info.
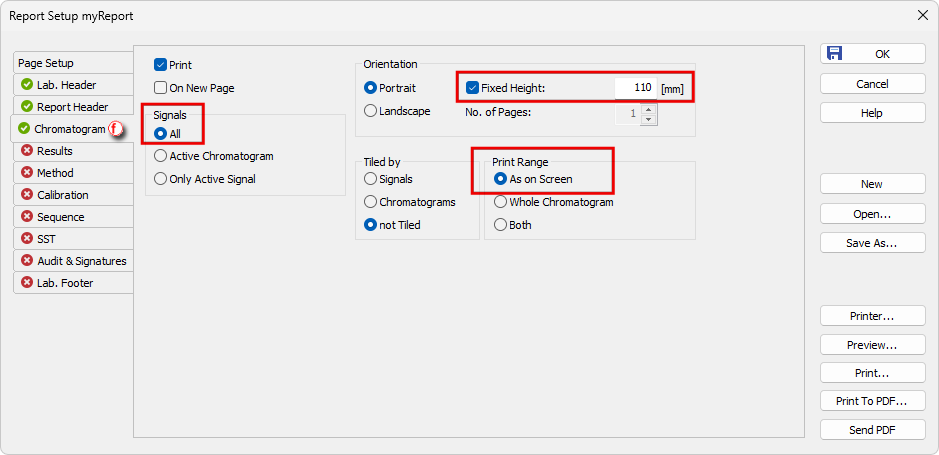
- Set the Chromatogram section. Only the format of printed graphs is set here, result tables are printed based on Results tab, see next step.
- Click the Chromatogram tab ⓕ.
- Check the options Print and Fixed Height and set the height to 110 mm.
- Select the options Signals - All and Print range - As On Screen.
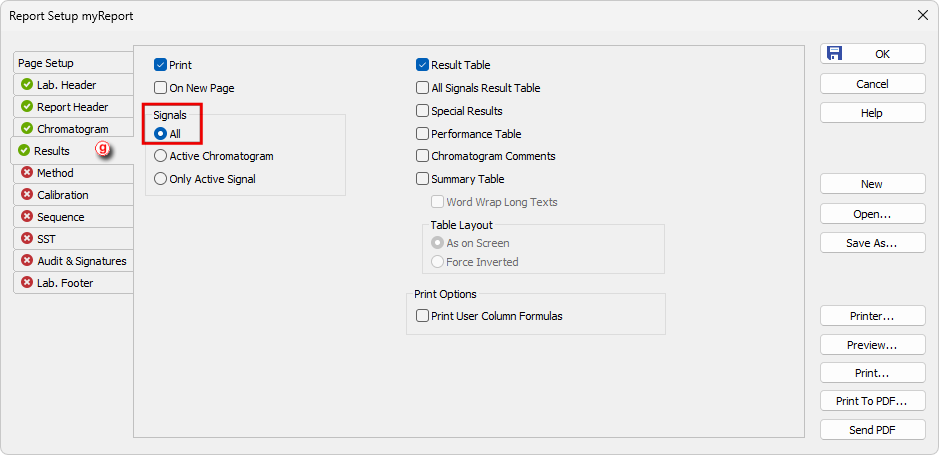
- Set the Results section.
- Click the Results tab ⓖ.
- Check the options Print and Result Table.
- Select the option Signals - All.
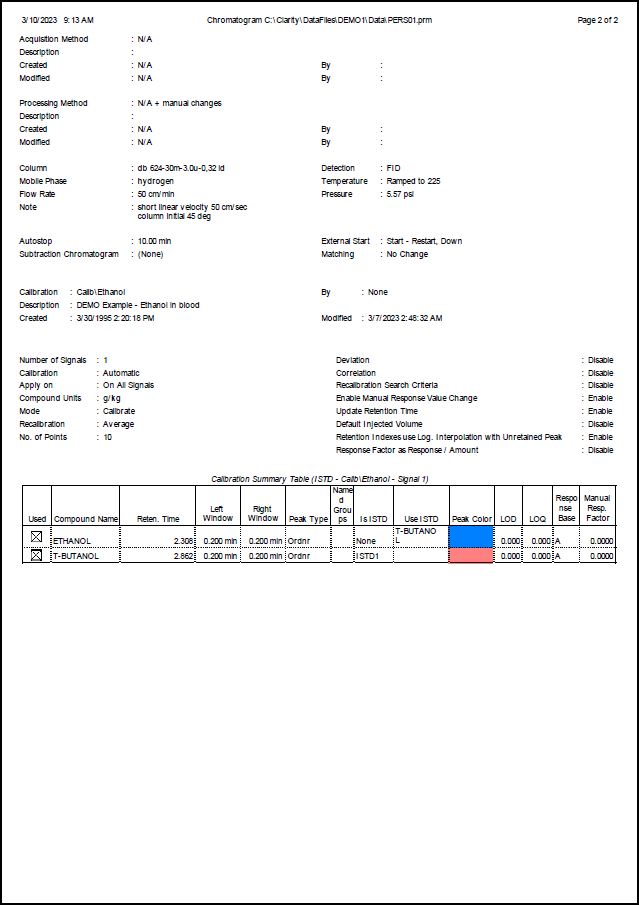
- Set the Method section.
- Click the Results tab. ⓗ
- Check the options Print, On New Page, Info Header, Instrument Parameters and Acquisition Parameters.
- Select the option Signals - All

- Set the Calibration section.
- Click the Calibration tab ⓘ.
- Check the options Print, Info, Parameters and Summary.

- You can preview your report by clicking Preview.... For more info see Printing or previewing a report.
- Click the OK to save the report style.