The report may include information about methods, calibrations, chromatograms etc. It is possible to setup what information you would like to include in the report as explained in Setting up a report style.
Caution:
While setting reports it is necessary to pay attention to several crucial settings bellow:
- The information on the report will vary depending on which window we open it from, even if we use the same report style.
For example, the Chromatogram tab in the Chromatogram Report Setup refers to the chromatograms opened in that specific window. Same tab in the Calibration Report Setup refers to the calibration standard opened in the Calibration window if any. In the Instrument window it will refer to the chromatograms produced after the last run or analysis.
- Only opened chromatograms will be printed. For this reason when setting up automatic printing from Single Analysis, Sequence, Batch windows etc. Open in Chromatogram Window option must always be used as well.
- If you set up the report to be printed automatically it is always necessary to specify Report Style to be used.
Note:
It is also possible to report multiple already measured chromatograms at once using the Batch dialog. See Post-run Options from Batch topic for more info.
For more info regarding reports see the Clarity
To Print a Report:
- Select File - Print in the Instrument, Calibration, Chromatogram or Sequence windows. In Method Setup click Report Setup icon and in the following dialog click Print....
- Print dialog will open for you to setup your printing options and confirm the printout.
To Print to PDF:
- Select File - Print to PDF in the Instrument, Calibration, Chromatogram or Sequence windows. In Method Setup click Report Setup icon and in the following dialog click Print to PDF.
- Print to PDF dialog will open for you to enter file name confirm the saving of the file.
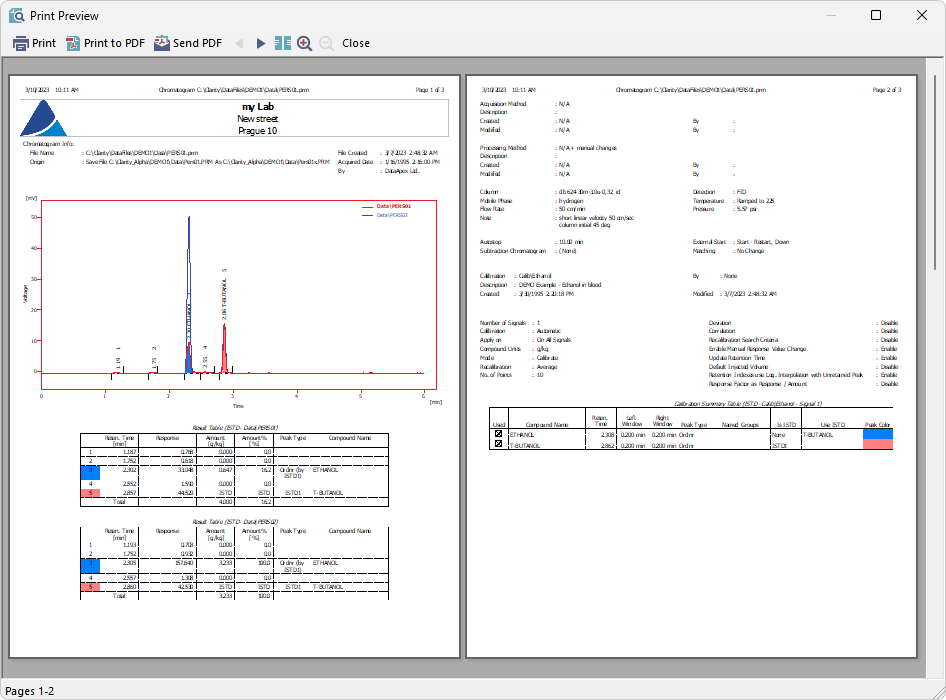
To display Print Preview:
- This feature is useful while preparing your own report style to check whether the outcome is as needed.
- Select File - Print Preview in the Instrument, Calibration, Chromatogram or Sequence windows. In Method Setup click Report Setup icon and in the following dialog click Preview....
- Print Preview dialog will open. From there you can browse or print the report.
Automatic report generating after analysis is finished:
By default generated reports are placed next to the original files, to change it use Setting - User Options in the Instrument window. Navigate to Directories tab and specify your custom path.
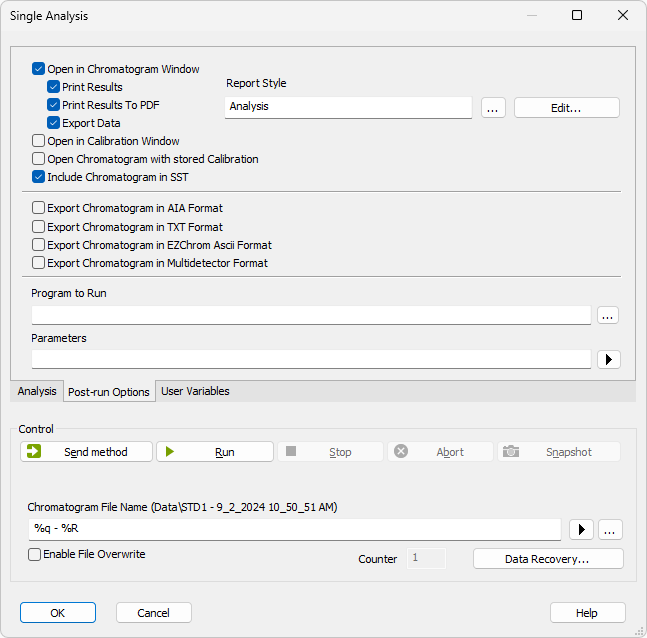
Single Analysis
- Navigate to Single Analysis - Post-run Options tab.
- Check options Open in Chromatogram Window, Print Results and/or Print Results to PDF.
- Select Report Style by clicking
 button.
 - It is also possible automatically export data, to do so check Export Data option. What should be exported can be set by using Setting - Export Data in the Instrument window.
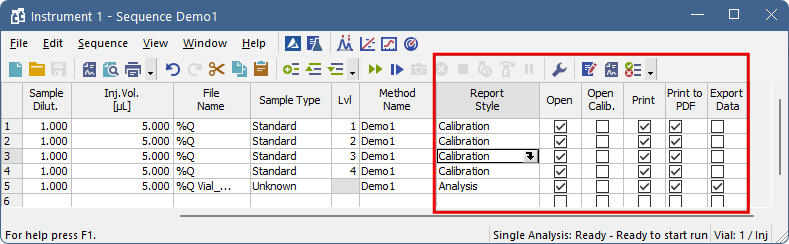
Sequence
- Procedure is similar to the single analysis. In Sequence window some of the required columns are hidden by default, to display them right-click the sequence table and use Setup Columns in the following dialog move desired columns to the Show Columns list.
- Check checkboxes in columns Open, Print and/or Print to PDF on rows where report should be generated.
- Select Report Style for each row where report is generated. It is possible to modify specif report style by selecting its cell and clicking
 .
. - It is also possible automatically export data, to do so check Export Data option. What should be exported can be set by using Setting - Export Data in the Instrument window.