It is possible to select what information and how you want to have printed in the report. You can create different report styles and store them in different *.sty files.
To see an example on how to set up a style to obtain a specific layout see chapter Creating a report (example).
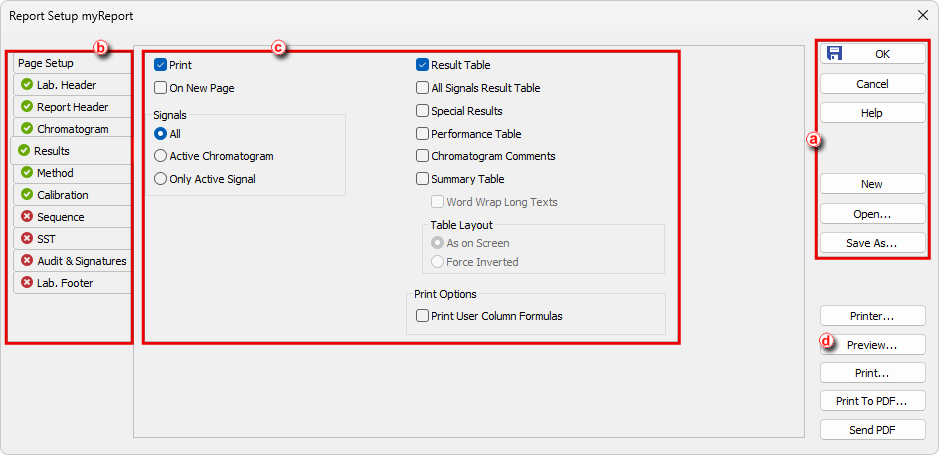
- From the Instrument, Calibration, Chromatogram or Sequence windows, select File - Report Setup. From the Method Setup window click the Report Setup button.
- Click the New button if you wish to create a new report style or click the Open button ⓐ to open existing report style. Name of currently opened style is included in the window header.
- Select the tab corresponding to the section you wish to modify ⓑ.
- Click and drag the tabs to a new position if you wish to change the order in which they will be printed in the report. Tabs can also be moved via context menu which is invoked after right-clicking on them. The first two (Page Setup, Lab. Header) and last two (Audit & Signatures, Lab. Footer) tabs have fixed position.
- Select options you would like to include in that section. ⓒ
- Click Preview ⓓ to see the result preview and repeat steps 3.-5. if you wish to modify anything.
- Click Save As to save the report style under a new name or OK to accept the changes to the current style. ⓐ