Clarity Configuration
This chapter will guide you through the basics of configuring your instrument in Clarity. The process is similar for most controlled devices, but for more details on specific settings, always refer to the device’s dedicated manual. You can easily access it by pressing F1 in the Clarity software and navigating to Control Modules section.
As an example, we’ll go through the configuration of Colibrick:
- Open the System Configuration dialog.
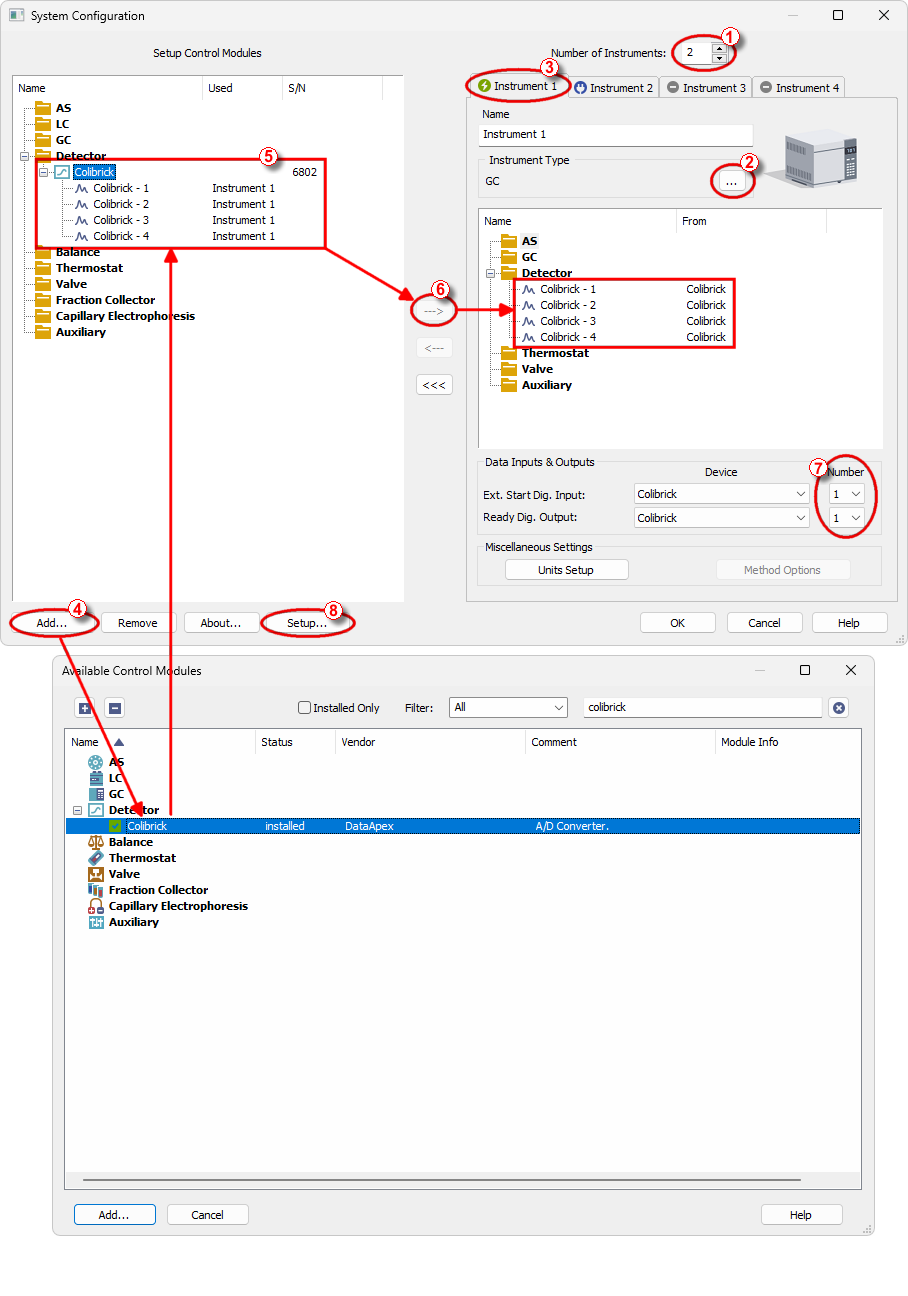
In the main Clarity window, either click the  icon on the left-hand toolbar or go to the System menu and select Configuration. This opens the System Configuration dialog, where you manage instruments and control modules. See Fig "System Configuration dialog".
- Set the Number of Instruments ①.
In the top part of the System Configuration dialog, set the required number of instruments. Each instrument represents one independently operating chromatographic system.
You can adjust the number using the arrows or by typing directly into the field. Maximum number of instruments is 4.
Below the Number of Instruments field, each instrument is represented by a separate tab ③ on the right side of the dialog (e.g., Instrument 1, Instrument 2). On each instrument tab, you can define its type, assign control modules, and adjust specific settings, as you'll see in next steps.
Note:
You can run analyses only on the purchased instruments, the other ones can be used as "offline" instruments for evaluation of chromatograms from other projects.
- Set Instrument Type②.
Click on the button  next to the instrument type to open the Instrument Type dialog. Then select the appropriate type — most commonly GC or LC.
Additional instrument types and subtypes such as PDA or GPC may be available if the corresponding extensions have been purchased and activated.
- Open the Available Control Modules dialog.
Click on the Add ④ button at the bottom of the dialog. This opens the Available Control Modules dialog, which lists all supported devices.
- Find your device.
In the Available Control Modules dialog, search for your device. In our example, type Colibrick into the filter field to quickly locate it ⑤.
Select the module and click Add.
- Setup the device.
After clicking Add, the Setup dialog for the selected control module will open. Each module has its own unique Setup dialog with unique settings, but typically you’ll configure how Clarity communicates with the instrument — for example, by specifying a LAN address, COM port, etc. Setup dialog can be also invoked by selecting the device and clicking the Setup...⑧ button in the System Configuration dialog.
In our example, the DataApex Colibrick Setup dialog will appear. In our case we leave the default settings here.
Confirm the dialog by clicking OK.
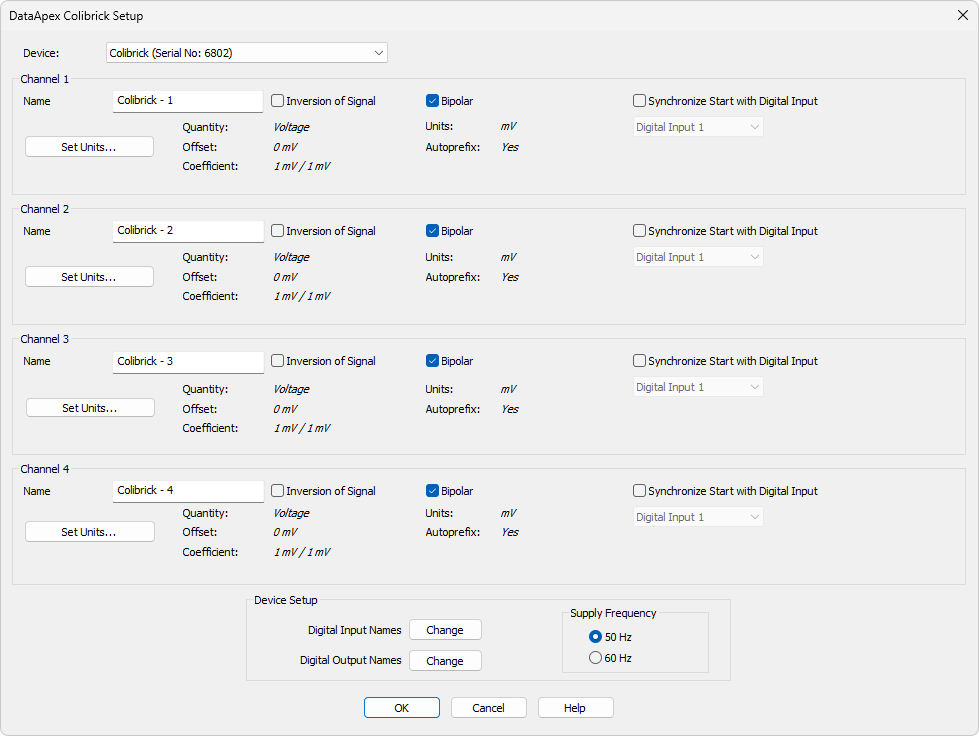
Colibrick Setup dialog
- Assign the device to an Instrument.
Still in the System Configuration dialog, select the device on the left side and drag and drop it to the right, alternatively use the  button ⑥.
- Set the Data Inputs & Outputs ⑦.
Here, you set how the measurement will be started.
For specific instructions tailored to your instrument, refer to its manual (press F1 in the Setup dialog of the device to open the help on the section dedicated to the device). For special scenarios involving autosamplers, consult the User Guide Connecting Autosamplers topic.
- Save the configuration.
Click OK to confirm and close the dialogs.