The simplest setup of Clarity in Network includes at least one Clarity, one Clarity Offline, and a shared network disk, which can either be located on the same PC or set up as a separate unit.
The diagram below shows an example of this setup. It is also possible to include more than one Clarity within the same network.
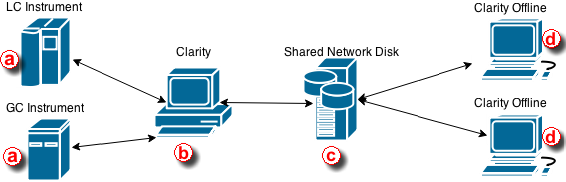
In the example configuration shown above:
- The LC and GC instruments ⓐ are controlled via Clarity ⓑ.
- Chromatograms, calibrations and methods are all saved on a shared network disk ⓒ using directory configuration.
- Clarity Offline ⓓ is then used for evaluation of acquired chromatograms and preparation of methods which are also saved on the shared network disk.
- Clarity ⓑ can then send these prepared methods to the corresponding instruments.
The shared network disk can be accessible to all computers in the network, allowing more complex configurations than the one shown above.
Caution:
When using multiple Clarity stations in a network (e.g., one for instrument control and another Clarity Offline station for data evaluation), it is essential that all stations run the same version of Clarity.
The following step-by-step guide will help you configure the Clarity in network solution.
Procedure A: Configuring Clarity ⓑ - Data Acquisition station
- In the main Clarity window, go to System - Directories or use the icon
 . Instrument Directories for Projects dialog will open.
 - Select the Instrument that will share all the created files (chromatograms, calibrations, methods, sequences, reports etc.).
- Use
 ⓔ to select the shared network disk. Once the location is selected, click OK. The path to the shared network disk is now filled in for the selected Instrument.
 - If you want to use the same directory for all Instruments, check the All As Instrument 1 ⓕ option. This will copy the directory path from Instrument 1 to all other Instruments.
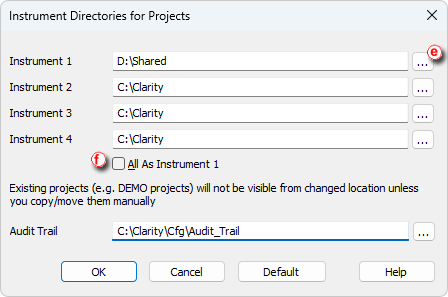
It is recommended to keep the Audit Trail locally and, if needed, you can set up an automatic export to a network drive (via the GLP options).
If you decide to store the Audit Trail on a network drive, make sure that each Clarity station uses its own dedicated folder to ensure correct logging and to prevent overwriting or mixing of audit records.
- Click OK to save these settings.
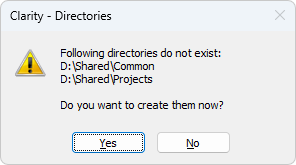
- When configuring the directory for the first time, a message appears asking to create the necessary structure. Click Yes to allow it. The Common and Projects folders are created automatically with default files required for proper functionality.
- When logging in for the first time using the new directory configuration, you will be prompted to create a new project.

- Enter the project name and click OK.
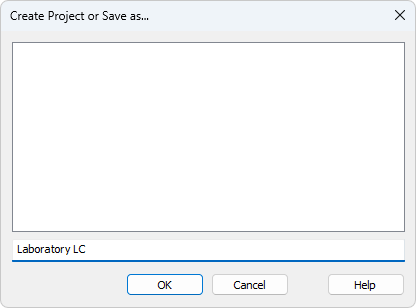
All files created or measured within this project will be stored on the shared network disk, making them accessible to other Clarity stations in the network.
Procedure B: Configuring Clarity Offline ⓓ - Data Evaluation Station
The directory must be configured so that Clarity Offline can access chromatograms, calibrations, and methods stored on the shared network disk.
- Configure the directory according to step 1-6, described in Procedure A.
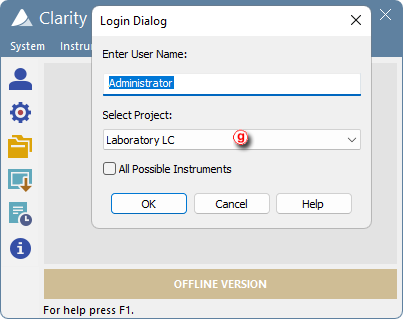
- When logging in, select the corresponding project (the one created in step 9 of Procedure A) from the drop-down ⓖ list and click OK.
If the project is visible in the list, the setup has been completed successfully. For additional confirmation, you can try acquiring a chromatogram in Clarity ⓑ and open it in Clarity Offline ⓓ.