Clarity enables to send specific parameters over the internet to be monitored via Clarity2Go application. In this way you can monitor your analyses while outside the laboratory. Note that both PC with Clarity and smartphone must be connected to internet. For more information regarding Clarity2Go installation refer to www.dataapex.com/product/clarity2go.
The whole solution consists of three independent parts:
- Clarity station (at your side) - sends information about state and running analyses to the server.
- Server
- Client (at your side) - device (smartphone or tablet) with installed Clarity2Go application processes information from the server.
DataApex is providing a free public server for this use.
How to set up Clarity:
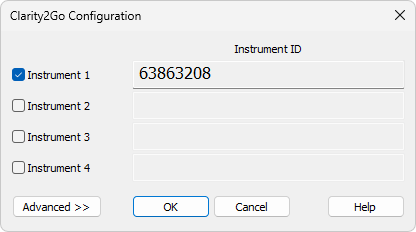
- In the Clarity main window, go to System menu and click on the command Clarity2Go....
- In the opened Clarity2Go Configuration dialog, check the checkbox of Instrument 1 to 4, depending on the instruments you want to monitor. Every checked Instrument will get its unique Instrument ID.
- Click the OK button to save the configuration and continue with steps described in How to set up Clarity2Go section or refer to Advanced options bellow.
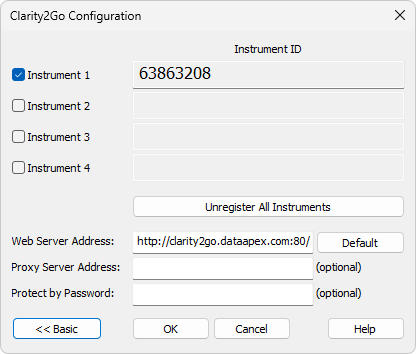
Options described below are optional and are not obligatory for correct functionality. They are revealed by clicking the Advanced button.
- Unregister All Instruments - disables the monitoring in the Clarity2Go application. Instruments that have been registered will no longer be available for monitoring. If you will later change your mind, you will have to generate new Instrument ID.
- Web Server Address - do not change this field. It defines the address of Clarity2Go web server. Address other than default will result in the monitoring to be not functional! Press the Default button to set functional web address of the server.
- Proxy Server Address - consult with your local administrator if a proxy server is applied in your local network and then provide the proxy server address.
- Protect by Password - provided password will be valid for all Instruments. The same password needs to be provided in the Clarity2Go application to unlock the monitoring.
- Click the OK button to save the configuration and continue with steps described in How to set up Clarity2Go.
How to set up Clarity2Go:
Once you have configured instrument(s) in Clarity, it's time to monitor those instruments using Clarity2Go application. This part assumes that you have Clarity2Go for Android application installed and running.
- Make sure that you are not in the Clarity Demo mode, indicated by a gray stripe at the bottom of the application with the inscription DEMO mode. Tap on the TURN OFF DEMO.
Note:
Clarity Demo mode does not allow to add instruments.

- In the Settings, tap on Demo - Switch to demo mode which turns the Clarity Demo mode OFF.
- Return back. In case you are configuring Clarity2Go for the first time, you will see that there is no instrument.
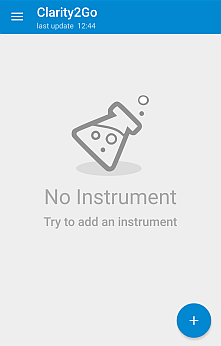
- Tap on the blue "plus" button at the bottom right corner to add a new instrument.
- Enter Instrument ID that has been generated by Clarity and enter password (only if you have set it up in Clarity). Tap on the OK button to start monitoring this instrument.
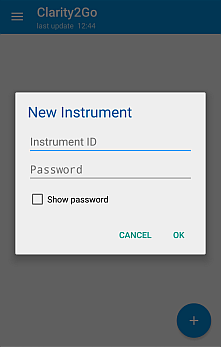
- The newly configured instrument will be added to the list of instruments that are being monitored.
Note:
You can invoke the application menu by tapping on the 3 horizontal lines - the menu contains Settings, built-in Help and About options.