Current hardware key with transparent grey casing
Currently supplied RkNDUSB hardware key use HID (Human Interface Device) technology and therefore do not require any additional drivers. These keys can be identified by their transparent grey casing (see image below).

Current (left) and older (right) hardware key
Older hardware key with blue casing
For older RkUSB key (blue casing) the drivers should be installed automatically during the installation of Clarity. For this reason it is important to install Clarity before plugging the hardware key. If the hardware key is not working properly, follow the procedure below to resolve the issue.
- Connect the hardware key to a USB port on the computer.
- Install the Rockey drivers by running INSTDRV.EXE in C:\CLARITY\Bin\HW_DRIVERS\ROCKEY\.
- Select the Install USB driver option and click on Next to finish the installation.
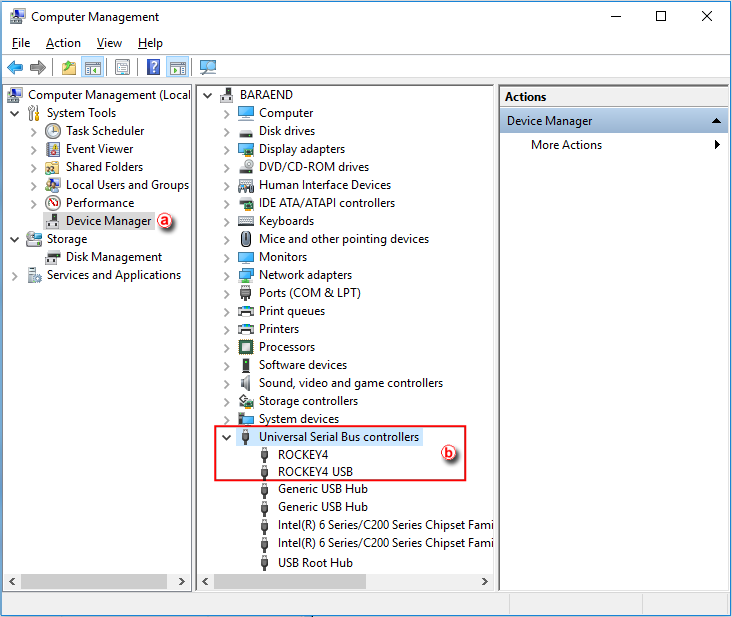
- Verify that the driver has been installed correctly. Meaning that the Device Manager ⓐ has the item "Universal Serial Bus Controllers" - "Rockey4 USB" ⓑ.
If this does not work, try the following procedure after the installation of Clarity:
After connecting the hardware key, Windows will detect a new Plug and Play device and the Found New Hardware Wizard will appear.
- Select "Search for a suitable driver for my device."
- Select "Specify a location" and then select the C:\CLARITY\Bin\HW_DRIVERS\ROCKEY\folder. The rest of the installation will be carried out automatically.
Note:
On Windows 10 and Windows 11, the driver for older hardware key can only be installed if Memory Integrity/Core isolation function of Windows Security is turned off. This function is turned on by default. If an incompatible driver is already installed on the computer, it cannot be turned on. But if it is enabled, the driver installation fails with Error code 39.