For detailed information about LIMS integration, configuration, and advanced export settings, refer to the separate Clarity LIMS Manual available also at dataapex.com.
Before exporting data to a LIMS, it is recommended to review the chromatograms in Clarity to ensure that all results and calculated values are correct (see chapter Comparing the results from several chromatograms).
Once the results have been verified, Clarity offers several ways to perform the export, depending on the workflow and user preference.
Setting up the Export Format
First, it is necessary to set the format of exported data. To do that, follow these steps:
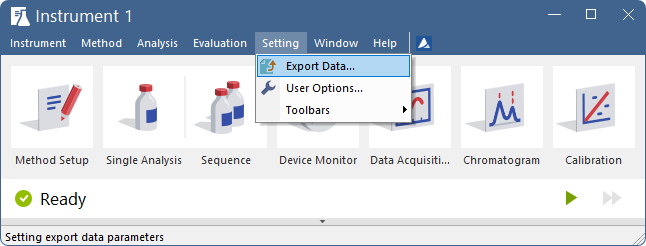
- Open Export Data dialog by using Settings - Export Data from the Instrument window.
- In the Export Content section ⓐ, select which data you want to include in the exported files. It is recommended to export the Result Table with In Fixed Format. This will ensure that the data will be exported always in the same format regardless of the setting on the screen. However, Fixed Format can only be used if the predefined set of exported columns meets your needs—if you require custom or user-defined columns, leave this option unchecked.
- Select Full Format ⓑ option. This will add the file name, date and time before each Result Table row to allow for easy sorting, which is particularly useful when using the Append option.
- Select the desired file formatting in Text Format ⓒ section.
- Select Export to - Text File ⓓ and choose preferred suffix. In the File Name ⓔ field, specify the directory where the export files should be created. If the field is left empty, Clarity automatically uses the chromatogram name as the file name and saves the exported file either to the chromatogram directory or to the directory defined in the User Options – Directories tab (for more details, see chapter "Setting up custom export and import directories").
- Check Append to export all results to a single file.

Note:
The settings defined in the Export Data dialog are stored in the active desktop file (.DSK). If multiple users need to export data in the same format, they must either share the same desktop file or configure their settings individually..
Ways to Export Results
Depending on the workflow and user preference, Clarity provides several ways to execute the export:
Export automatically after each single run
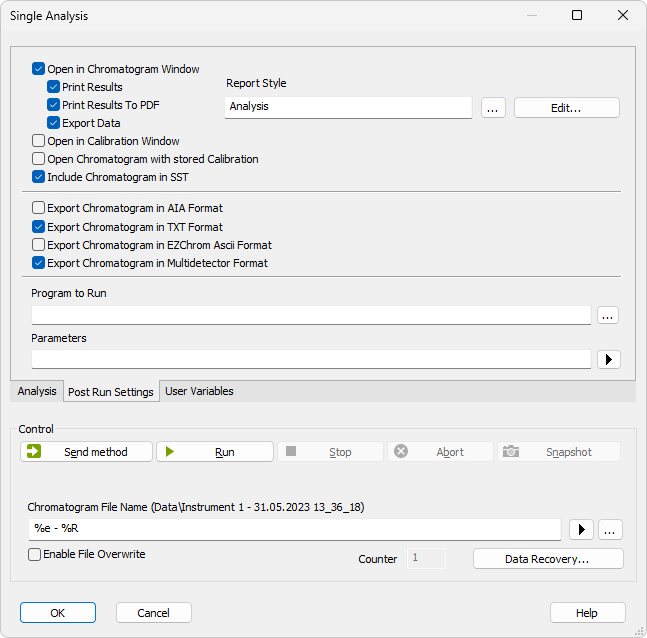
In the Post-run Options tab of the Single Analysis dialog, select Export Data.
Export for individual lines in a sequence
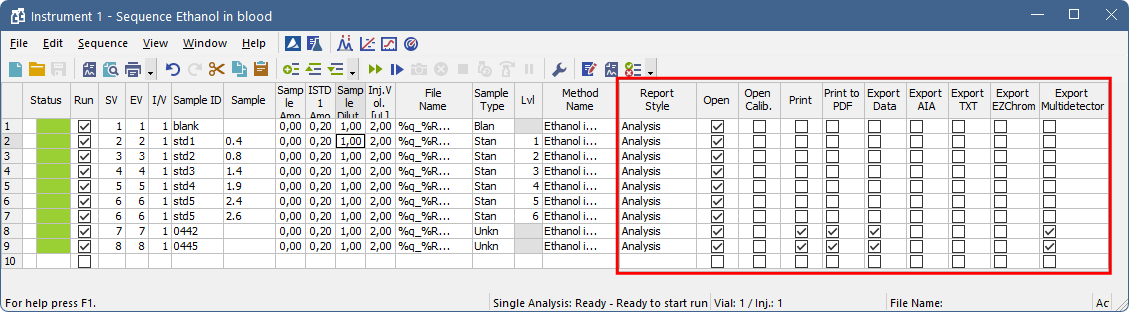
In the Sequence window, select checkbox in the Export Data column for row(s) to be exported. Note that the export is performed immediately after the run is finished, without any possibility of manual review of the results.
Columns defining export in the Sequence table are hidden by default; you can display them using the Setup Columns... command and use them to define the export format for each sequence line.
Export on demand for selected chromatograms
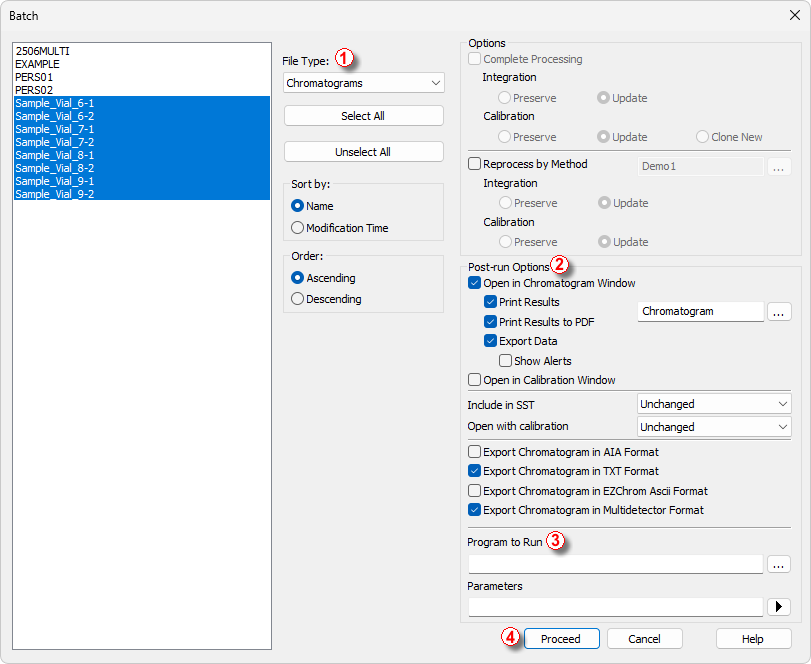
This can be done using the Analysis - Batch after the results have been reviewed.


- Select File Type ① and files to be exported from the list on the left.
- Select what action to perform from Post Run Options ②.
- The Program to Run ③ option can start an external application and pass the exported file name to it, allowing the LIMS to import the data automatically.
- Click Proceed ④.
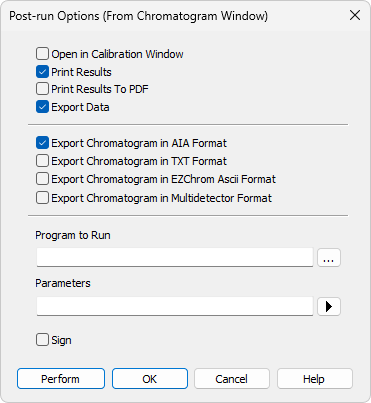
Export directly from the Chromatogram window
This option lets you export data from the chromatogram you are currently reviewing by selecting File - Perform Post-run Actions..., which opens the Post-run Options (From Chromatogram Window) dialog and performs the export according to the defined settings.
If this action is used on a regular basis, it is convenient to add the command directly to the toolbar. A toolbar button executes the action immediately using the configured settings, without opening the dialog. If you need to modify these settings, you must access the command through the menu (File - Perform Post-run Actions…).
To add the command to a toolbar, right-click any toolbar and select Customize.... In the Commands tab, find the Perform Post-run Actions... command in the File category and drag it to the desired position.
The toolbar configuration is stored in the active .DSK file.