In many workflows, it is useful to have reports printed automatically as part of the sequence — for example, to document each sample, create a summary for the whole sequence, or compare replicate injections. Clarity allows you to set up such automatic printing directly from the Sequence window.
Following reports can be printed automatically from the sequence:
- individual reports
- summary reports for the entire sequence
- summary reports for replicates
Before printing reports, please notice that printing in Clarity is in most cases WYSIWYG, i.e. when printing chromatograms, they need to be opened in the Chromatogram window, graphs and tables are printed as formatted on the screen. There is common report setup in Clarity, however the data printed may depend on from which window the print is invoked.
Individual reports
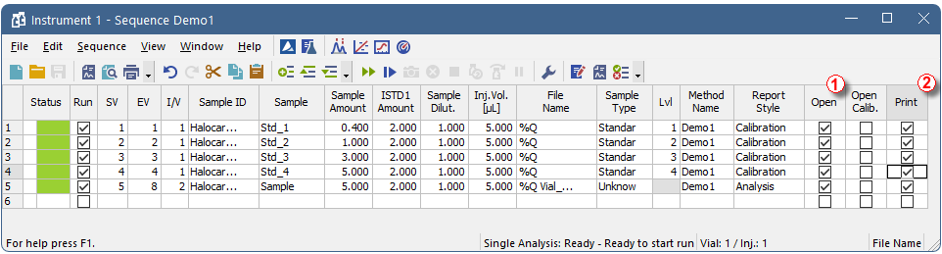
Individual reports can be printed for every analysis in the sequence. In our example, we want to print Calibration Standards one at a time, and have a summary report for the Unknown samples.
- In Chromatogram window, ensure the Overlay Mode is OFF.
- In Sequence window, check checkboxes in column Open ① and Print ② and/or Print to PDF for all the rows you want to print from.
- If required column is not present, invoke local menu and select Setup Columns and Show ③ the column you want to see.

- Select the Report Style you want to use for printing. The chosen Report Style determines both the content of the report and its formatting.
- Run the sequence.
With Overlay mode turned OFF, only one chromatogram is displayed in the Chromatogram window at a time. When an analysis with the Open option checked is finished, the resulting chromatogram is opened in the Chromatogram window and printed individually (if Print or Print to PDF is checked).
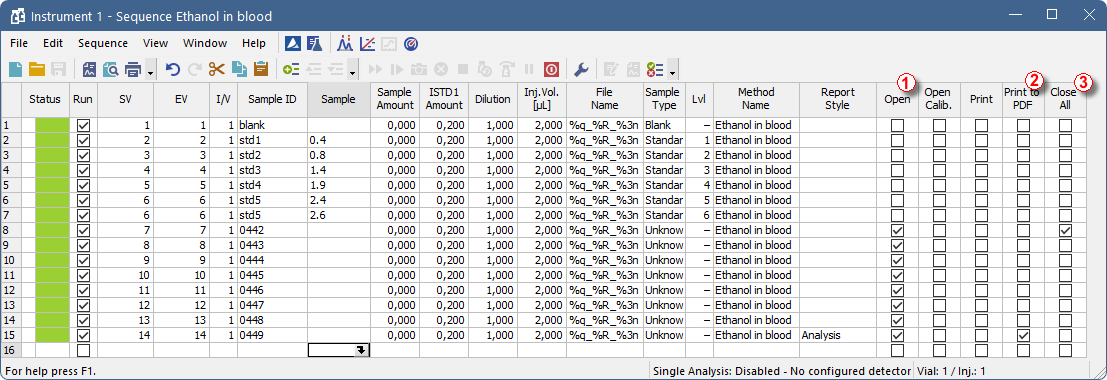
Summary reports for the entire sequence
- In Chromatogram window, ensure the Overlay Mode is ON
- In Sequence window, check checkboxes in column Open ① for all the rows you want to include.
- Print of the sequence will be invoked from the last row where Print to PDF ② column is checked.
- The Close All ③ column ensures chromatograms previously opened in overlay will be closed.
- If required column is not present, invoke local menu and select Setup Columns and Show the column you want to see.
- Open the Report Setup with Report Style you want to use and adjust it accordingly.
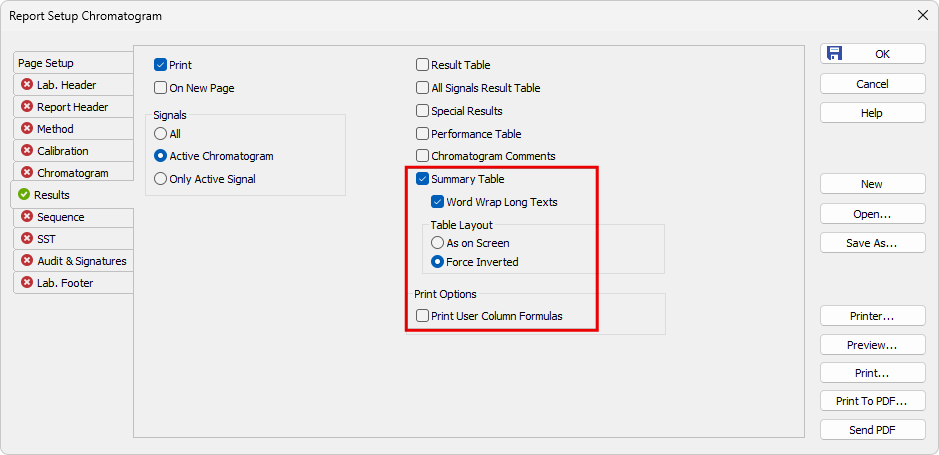
- To print all chromatograms as individual graphs, switch to Chromatogram tab and check the All Signals ④ and Tiled by Chromatograms ⑤
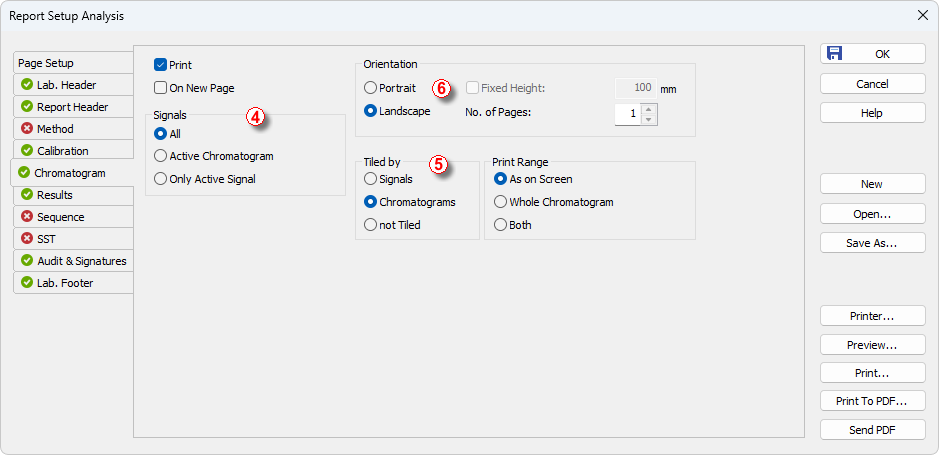
- To fit the page width, Landscape orientation ⑥ may be advantageous. Configure the tables layout in the Chromatogram window accordingly. Otherwise the tables will be split across multiple pages but aligned to allow the full table to be reconstructed when the pages are placed side by side.
- Save the Report Style by OK.
- Run the sequence.
The resulting report with setting used in this example will contain: Calibration Summary table, Calibration Level Tables, each compound calibration and graphs, Summary table for samples and Sequence Audit Trail.
With Overlay mode turned ON, multiple chromatograms can be opened in the Chromatogram window and printed together. On the first row we wanted to include, we used Close All to close any previously opened chromatograms. Each subsequent chromatogram with the Open option checked was then automatically opened into the Chromatogram window as soon as it was measured, and after the last one was opened, printing was triggered with the Report Style correctly adjusted for a summary report.
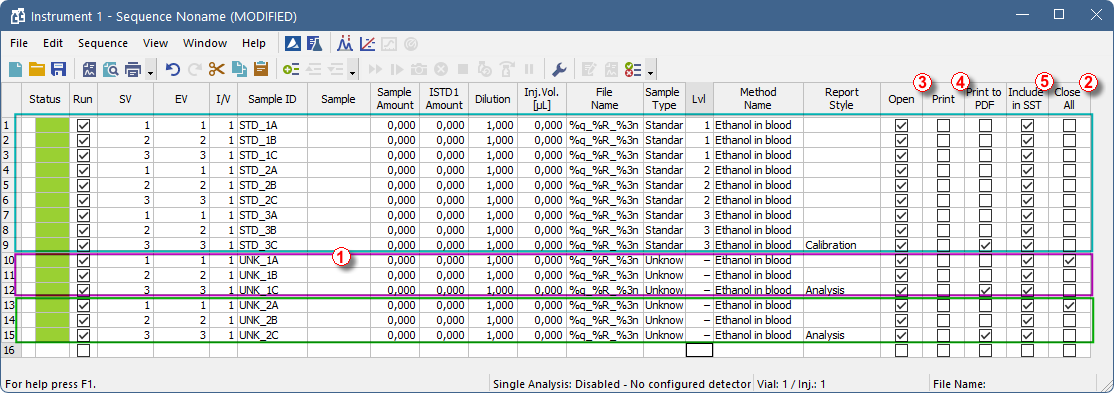
Summary reports for replicates
The process is similar to printing one summary report for the sequence. The difference is that for each sample there is a block of three rows (3 repetitions) ①. On the first row of the block, the Close All ② column should be checked to ensure previously opened chromatograms are closed. In all rows to be printed should be the Open ③ column checked. On the last row of the block, the Print ④ column should be checked and Report Style filled in to trigger printing of the report. If you want the SST results to appear in the report, make sure to check the Include in SST ⑤ column for the corresponding chromatograms.
In this example, we want to print calibration report after measuring all standards, and summary report for replicates for each unknown sample.