This chapter covers creating a calibration file. You should have at least one integrated measured standard to be able to fill in the desired peaks into the newly created calibration.
- Open the Calibration window: choose Window - Calibration in the Instrument window or click
 .
.
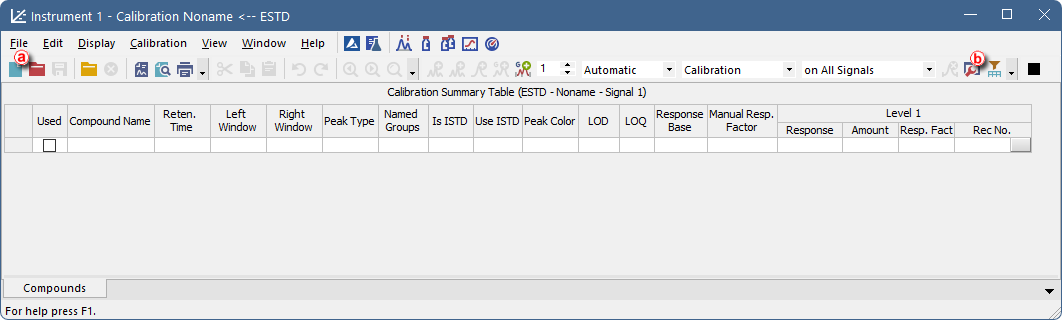
- Create a new calibration file: select File - New or click
 ⓐ .
ⓐ . - Open the Calibration Options dialog: choose Calibration - Options… or click
 ⓑ.
ⓑ.
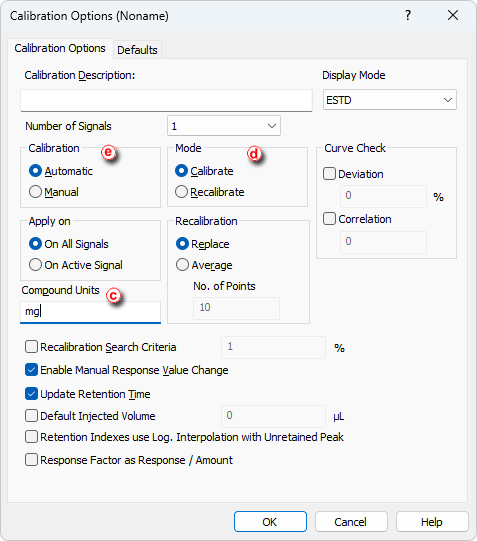
- Fill in the units in the Compound Units section ⓒ to suit your analysis conditions.
- Set the Mode to Calibrateⓓ .
- Set the Calibration option to Automatic to add the peaks without modification or Manual to modify them one by one ⓔ.
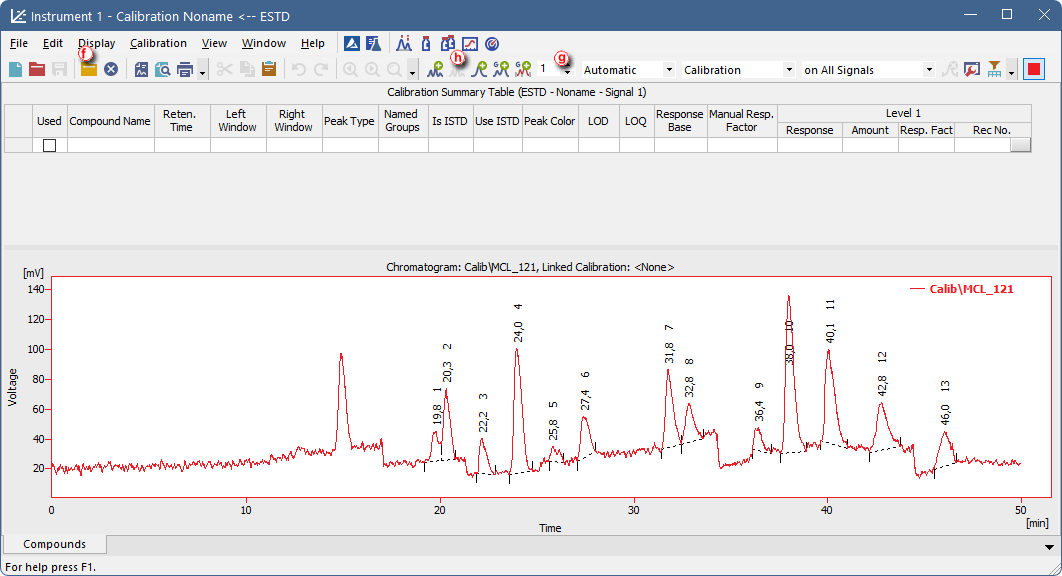
- Open integrated chromatogram of a standard: choose File - Open Standard… or click on
 ⓕ in the Calibration window.
- Add peaks belonging to the compounds of interest from the chromatogram of the standard to the calibration file.
Note:
Select Calibration - Add All or click on
 to add all integrated peaks or the Add Peak
  / Add Group
  icons to add specific peaks ⓗ. Regardless of the set Current Level ⓖ the peaks will be added to the first free level.
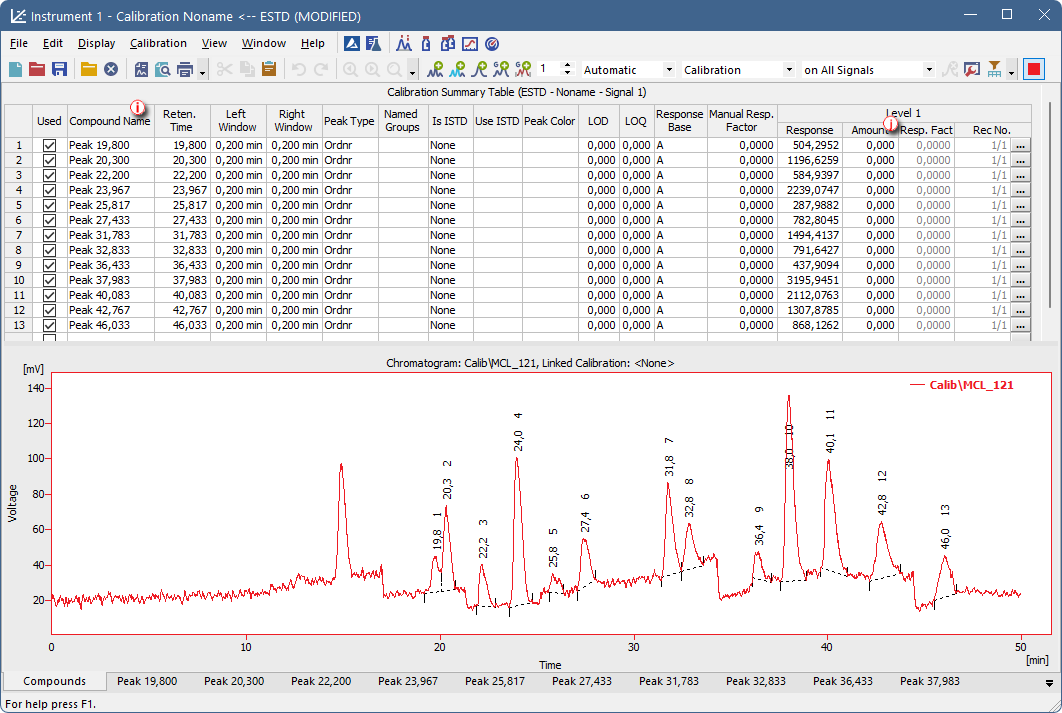
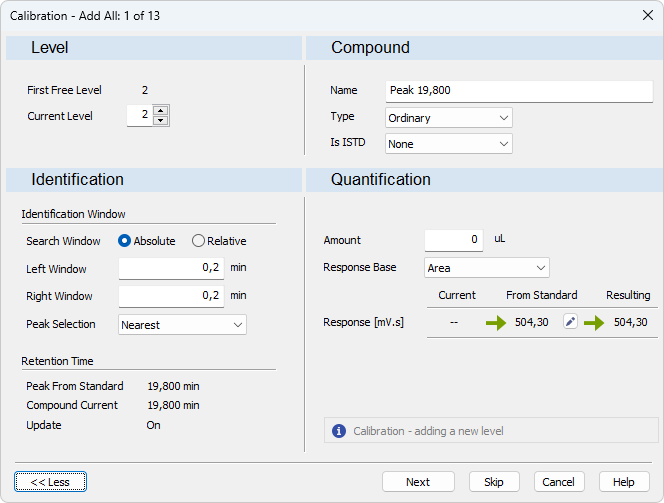
- If you selected Automatic calibration:
- Name the peaks identified in the Calibration Summary Table ⓘ by their retention times by typing the Compound Name for each peak. No compound name may be used more than once.
- Fill in the Amount ⓙ for each compound into the Calibration Summary Table.
- If you selected Manual calibration: Fill in the Amount, the Compound Name and set any other parameters related to the peak on the Calibration - Add Peak window. This window will open once for each one of the peaks processed.
- Save the calibration file - File - Save or click
 .
.