Here we describe how to add concentration levels to the calibration file to obtain the calibration curve of all compounds. This procedure has to be repeated several times, once for each calibration level to be added.
- Open the Calibration window: choose Window - Calibration on the Instrument window or click
 icon.
icon.

- Open the calibration file: choose File - Open… or click
 ⓐ.
ⓐ. - Open calibration standard: select File - Open Standard… or click
 ⓑ.
ⓑ.
Note:
Select a measured and qualitatively evaluated chromatogram where all peaks are available, if possible.
- Check that the Automatic option is selected in the first field and the Calibration option in the second field of the calibration mode settings ⓒ.
- The calibration level number is in the Current Level field ⓓ set automatically to the first free level.
- Add all peaks in the chromatogram of the calibration standard to the calibration file: select Calibration - Add All or click
 ⓔ.
ⓔ.
Note:
In case more peaks than expected emerge in the calibration, the surplus peaks can be deleted by selecting them in the Calibration Summary Table and deleting them using Calibration - Delete Compound or clicking on
 ⓕ.
ⓕ. - Set the amounts of the particular compounds into the Calibration Summary Table, into the Amount column ⓖ of the respective calibration level.
- Save the calibration file: choose File - Save or click
 ⓗ
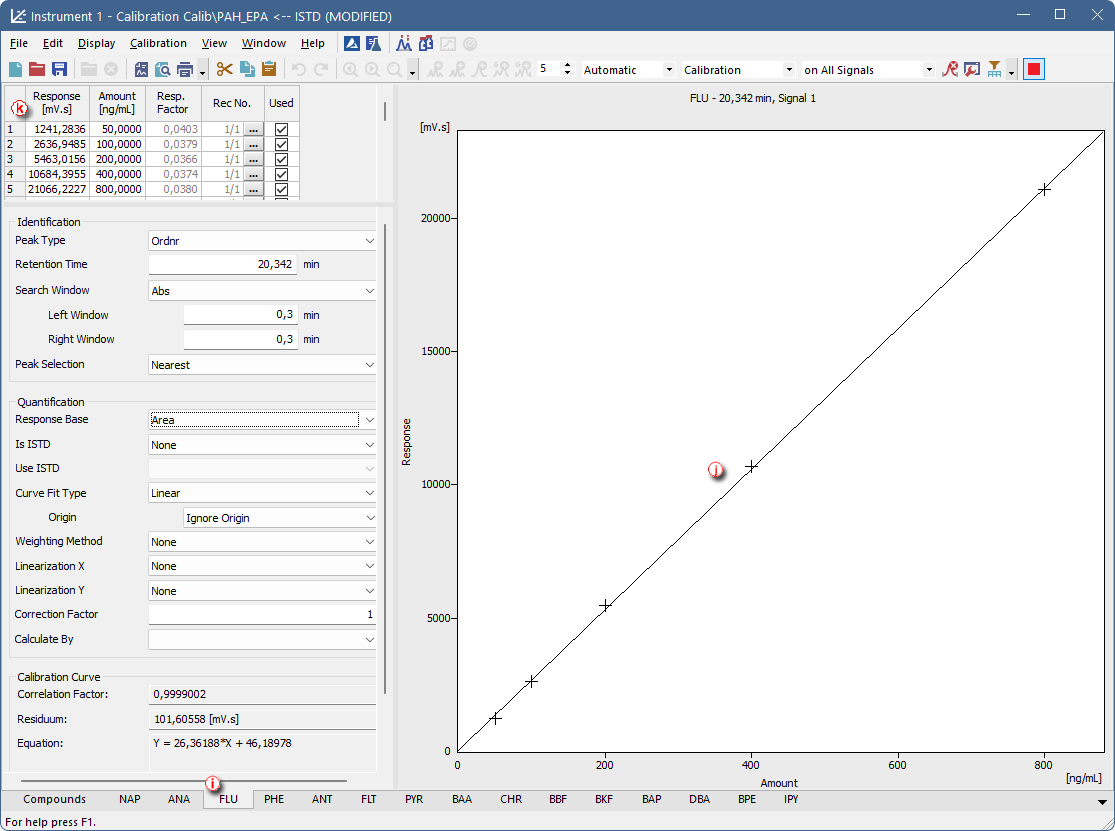
ⓗ - Click any tab below ⓘ and you will be able to see the calibration curve ⓙ with all the levels added for one specific compound ⓚ.